Welcome! I am a mom to two wonderful kids, a lovely retired greyhound, and a wife to a great husband. Needless to say, there are a lot of daily messes to clean up around our house. Daily Messes is my blog to share ideas on things to do with your kids, snack and meal ideas, crafts, and holiday fun. I hope you find something to enjoy!
Showing posts with label Fall. Show all posts

Tuesday, October 15, 2019

Pumpkin Muffins

It has finally begun to feel like Fall around here. We had some crazy days that were close to 90 degrees F in October! Definitely not normal weather for us. Now that it is finally cooler, I feel like making all kinds of Fall type treats. Of course, pumpkin is a huge Fall flavor! We've tried making pumpkin cheesecake, pumpkin cookies with a cream cheese filling, and pumpkin muffins. The boys and I love these muffins!

The pumpkin flavor is subtle and is perfect with the pecan streusel topping.

This recipe with make 24-28 muffins. I used parchment paper muffin/cupcake wrappers and a level ice cream/large cookie scoop to fill muffins.


PUMPKIN MUFFINS WITH PECAN STREUSEL 

Makes 24-28 muffins. Bake time: 25-30 minutes. Total time (prep/bake): 50-60 minutes.

You will need:
  • Muffin batter:
    • 2 1/2 cups all-purpose flour
    • 1/2 cups oats (I used old fashioned style oats)
    • 4 teaspoons pumpkin pie spice
    • 1 teaspoon baking powder
    • 2 teaspoons baking soda
    • 1 teaspoon salt
    • 1 cup brown sugar, lightly packed
    • 1 cup granulated sugar
    • 1 can (15 oz) pure pumpkin puree
    • 1 teaspoon vanilla extract
    • 2/3 cup vegetable oil
    • 1/2 cup applesauce, plain/unsweetened
    • 3 large eggs
  • Streusel Topping
    • 4 tablespoons unsalted butter, softened
    • 1/2 cup brown sugar, packed
    • 4 tablespoons oats
    • 4 tablespoons flour
    • 1/4 teaspoon ground cinnamon
    • 1/2 cup finely diced pecans
  • Misc.: Muffin wrappers, muffin tins, 2 large bowls
Directions:
  1. Preheat oven to 350 degrees F. Line muffin tins with muffin/cupcake wrappers.
  2. In a large bowl, mix together the flour, oats, pumpkin pie spice, baking soda, baking powder, and salt.
  3. In another large bowl, or in a stand mixer, mix pumpkin puree, granulated and brown sugars, vegetable oil, applesauce, vanilla, and eggs until just combined.
  4. Stir flour mixture into the pumpkin puree mixture. Mix until just combined. 
  5. Evenly fill the lined muffin tins with the batter. I found it easiest to use an ice cream scoop.
  6. Make the streusel topping. Mix the flour, cinnamon, oats, pecans, and brown sugar together. Mix in the softened butter. I use a fork to help mix the topping so that it forms into crumbles.
  7. Add a rounded teaspoon to the top of each muffin. If I have left over after each muffin has streusel, I distribute the remaining topping to the muffins. We love our streusel topping!
  8. Bake at 350 degrees F for 25-30 minutes. Muffins are done when you insert a toothpick in the center and it pulls out clean.

Wednesday, September 25, 2019

It's Officially Fall!

Despite the often gray rainy days and seasonal allergies, I love the Fall. I love wearing my jeans again, going to the pumpkin patch with friends, and seeing the leaves start to change colors. There are a lot of fun decorations (especially in October) and treats. I thought I would pull up some of my favorite posts that are great for Fall.

FOOD:

ACTIVITIES:

CRAFTS:

Tuesday, October 16, 2018

Fall Time Fun

It's October! It's been a crazy Fall so far. Just a week ago we were in shorts, sweating at the soccer field. Tonight, there is a frost warning. However, despite the often gray rainy days and Fall allergies, I love the Fall. I love wearing my jeans again, going to the pumpkin patch with friends, and seeing the leaves start to change colors. Although I did get some indoor decorations up, I haven't made many fun treats yet. To help motivate myself, I thought I would pull up some of my favorite posts that are great for Fall. I've got some new ideas too, so I'll post when I finally get to try them!

FOOD:

ACTIVITIES:

CRAFTS:

Monday, September 25, 2017

Friday, October 10, 2014

Easy Fall/Halloween Themed Pumpkin Snack

I love surprising the kids with fun snacks, and I especially love it when it is easy for me to do. The leave are changing and Halloween decorations are coming out, so I wanted to do something Halloween themed. I had clementines and green peppers, so I made orange/pepper pumpkins!
I carefully peeled the clementine so that it stayed intact. I then cut a little sliver of green pepper and stuck it in the middle to create a stem. It was a huge hit and super easy to do.

Tuesday, October 1, 2013

Halloween: Ideas, Crafts, Food, and Fun

I can't wait for Halloween! Of course since Halloween stuff starting showing up at the end of August at our local stores, the boys can't wait either. If you found us last year, you know we are big Halloween fans (well...except for scary movies, I'll pass on those). I have even more ideas for this year, but here are the ones from last year to get the season started.
CRAFTS:
  • Attack of the Play-Doh Spiders! These were one of my favorite crafts last year. They are a little time consuming, but a huge hit with the kids. These are a perfect treat to bring into school if you have food restrictions, because who doesn't love Play-Doh!?
  • Eerie Spiders and Ghosts Reuse old egg cartons and make spooky little spiders and ghosts.
  • Pumpkin Pots If you have a clay pot, a sharpie, maybe some green pipe cleaners, you can make a quick and easy Halloween decoration!
  • Ghostly Handprints These make a cute craft or Halloween card to send to Grandma/Grandpa.
  • Pumpkin Cards With a little paint, some paper, and the right shaped leaf, you can create a great Halloween card.
  • Pumpkin Stained Glass
  • Easy Halloween Luminaries
  • Pumpkin Alternatives If you don't want to deal with the mess of carving pumpkins, here are some alternatives.
  • Sweep Your Way Into Snacks: Broomstick Bags These make a great decoration or favor bag for a Halloween party!
  • Gourd Lighting (aka Pumpkin Candle Holder). I had this as a Fall and Thanksgiving idea last year, but it also fits well with Halloween.
  • Help! The Toilet Paper Roll Turned Into A Monster Easy to make monsters using toilet paper rolls.


  • FOOD:

    ACTIVITIES:
    • You've Been Boo'd! I cannot wait to do this tradition again in our new neighborhood!
    • Scare Up Some Cookies We had a cookie decorating play-date and the boys had a blast.
    • Spooky Storytimes Many local libraries and bookstores have Halloween themed storytimes! I included some favorite Halloween books so you can make your own storytime too!
    • Halloween BINGO This is great if you are stuck at home handing out the candy.
    • Pumpkin Picking (Pumpkin Patch) Every year we go with friends to the pumpkin patch and let the kids pick out a pumpkin. We usually end up at the farm's store eating apple fritters or donuts and drinking apple cider. It's a great time and I look forward to it each year.
    • Haunted Gingerbread House We decorate a gingerbread house at Christmas as a family and last year we started decorating a Haunted Gingerbread House for Halloween. It's lots of fun!
    • Halloween Scavenger Hunt Card Now that we walk to the bus stop, I am really looking forward to using these again.
    • Halloween Time Fun: A Crossword Puzzle
    • Halloween: A Word Find

    TIPS:

    Monday, September 23, 2013

    Apple Ice Cream Cups

    I love apple pie and ice cream. However, I don't always want to make an apple pie to go with the ice cream in my freezer. This is a really easy solution. It's not quite apple pie because it doesn't have a crust, but it's close! (If you like apple pie too, check out my Apple Pie Cups post. You bake apple pie filling in an apple topped with pie crust!)

    You will need:
    • Red apples
    • Cinnamon
    • Sugar

    Directions:
    1. Preheat oven to 375 degrees F.
    2. Hollow out an apple (those extra pieces make a great snack while it's baking!). Make sure you don't puncture through the bottom and sides! DM TIP: I used an apple corer to get most of the core out. I then used a knife to widen the opening on the top and a spoon to scoop out the apple and the remaining core.
    3. Combine cinnamon and sugar to taste. DM TIP: I used 1 tablespoon sugar and 1/4 teaspoon cinnamon. It was enough for 3-4 apples.
    4. Sprinkle cinnamon/sugar mixture inside the apple. (Make sure to get the bottom and sides.)
    5. Place about 1/4 inch of water in the bottom of a baking dish and place apples in the dish.
    6. Bake at 375 degrees F for 50-60 minutes. You want the outside to be softened, but not mushy.
    7. Let cool for a little bit or it will melt the ice cream!
    8. Place a scoop of ice cream in the apple and enjoy!

    Monday, September 16, 2013

    Apple Cider Donuts (They're Baked!)

    Despite having temperatures in the 90's last week, I wanted to celebrate the coming of Fall. Some of our trees have already lost their leaves and some are just starting to turn colors. I was in the mood to bake, so we tried making a new recipe.

    What goes better with Fall than apple cider? Apple cider donuts!

    APPLE CIDER DONUTS, BAKED
    www.DailyMesses.com

    DM TIP: I used Wilton's Donut pan, which turned out well. It has space for 6 donuts. I was able to get 14 donuts out of the recipe below. Norpro has a 6 and 12 space donut pan as well.

    For the donuts, you will need:
    • 1/2 cup apple cider
    • 1/4 cup buttermilk
    • 1/4 teaspoon vanilla extract
    • 1 large egg
    • 2 tablespoons butter, softened
    • 1 3/4 cup flour
    • 1/2 cup sugar
    • 3/4 teaspoon baking powder
    • 1/2 teaspoon baking soda
    • 3/4 teaspoon cinnamon
    • 1/2 teaspoon nutmeg
    • 1/2 teaspoon salt
    For the topping, you will need:
    • 3 tablespoons apple cider
    • 2 teaspoons cinnamon
    • 1/4 cup sugar


    Directions: 
    1.   Preheat oven to 400 degrees F.
    2.   Spray donut pan with a non-stick spray and set aside.
    3.   In a bowl, mix together flour, baking soda, baking powder, nutmeg, cinnamon, and salt.
    4.   In a separate bowl, mix together sugar and butter until combined.
    5.   Add egg and vanilla to sugar/butter and continue mixing.
    6.   Next, stir flour mixture into the sugar/butter/egg mixture.
    7.   Add in buttermilk and mix together.
    8.   Finally, add in apple cider and mix until it is just combined.
    9.   Fill donut pan about 1/2 full and baking for 8-10 minutes, or until golden brown.
    10. Remove from oven and flip onto a cooling rack.
    11. Mix the remaining cinnamon and sugar for the topping.
    12. Once the donuts have cooled enough to touch, brush apple cider over the top and sides.
    13. Dip donut into the cinnamon/sugar mix.
    14. Enjoy!


    DM Alternatives: You could also dip the cooled donuts in an apple cider glaze (whisk together 1 cup powdered sugar and 2 tablespoons apple cider). You could also sprinkle cinnamon/sugar on top of the glaze.


    Wednesday, September 11, 2013

    Tic Tac Toe for Fall

    My boys love playing tic tac toe with each other. It's a great game for them to play together at home or even in the car.

    I have a tic tac toe board below, as well as game pieces to cut out.


    Thursday, November 22, 2012

    Thanksgiving: A Word Find


    Happy Thanksgiving! I hope you have a wonderful day filled with food and family!


    STOP! ANSWERS BELOW!


    Wednesday, November 7, 2012

    Easy Pumpkin Dip


    If you love pumpkin pie, you will love this dip! It's been a huge hit at our house. I put it out at dinner and went to get the bowl to put the left-overs away. I came back to Higgins licking it out of the pumpkin!

    This dip is easy and quick to make. It took me about 15 minutes (cleaning out pumpkin, mixing ingredients together). It should chill a couple of hours before serving though.


    You will need:
    • 15 oz can pumpkin
    • 8 oz container Cool Whip (thawed)
    • 5 oz box of Instant Vanilla Pudding (you will only use the powder!)
    • 1/2 tablespoon Pumpkin Pie Spice
    • 1 teaspoon ground cinnamon
    • Cinnamon for topping (about 1/2 tablespoon)
    • Small pumpkin
    • Dippers: Vanilla Cookies (like Nilla Wafers), apple slices, celery, etc.

    Directions:
    1. Mix all the ingredients together.
    2. Chill in a bowl for about 3 hours before serving.
    3. Cut the top off of the pumpkin and hollow out. You want the inside to be as smooth as possible.
    4. Before serving, fill the pumpkin with the dip.
    5. Optional, sprinkle cinnamon on top of the dip before serving.

    Wednesday, October 17, 2012

    Pumpkin Stained Glass


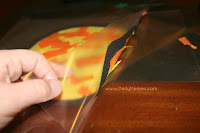
    For an easy "stained glass" craft, you will need contact paper (2 pieces per stained glass), scissors, and pieces of colorful tissue paper.

    Directions:
    1. Before removing the contact paper backing, cut out a pumpkin shape. You will need two shapes (for the front and back).
    2. Cut out the same shape in construction paper. Cut out the middle portion. This will be the border that gives shape to the stained glass.
    3. Remove the backing from one piece of contact paper. Lay on the table, sticky side up.
    4. Lay down the construction paper border.
    5. Lay down thin pieces of tissue paper.
    6. Remove backing from second piece of contact paper and lay on top, sealing the tissue paper in. Trim any excess contact paper if needed.
    Optional: You can omit the construction paper border.

    Monday, October 8, 2012

    Pumpkin Cards


    You will need:
    • Craft paint (orange, brown, green)
    • Construction paper or printer paper 
    • Paint brush(es)
    • Round leaves (look for ones with lots of veins and wrinkles)

    Directions:
    1. Lightly brush a coat of orange craft paint on the bumpiest side of the leaf.
    2. Press onto the piece of paper.


     3. Using paint, draw on a stem, leaves or vines.
    Use different sized leaves to get
    different sized pumpkins!