Welcome! I am a mom to two wonderful kids, a lovely retired greyhound, and a wife to a great husband. Needless to say, there are a lot of daily messes to clean up around our house. Daily Messes is my blog to share ideas on things to do with your kids, snack and meal ideas, crafts, and holiday fun. I hope you find something to enjoy!

Saturday, June 30, 2012

Broccoli Salad

This is a super easy to make broccoli salad that has always been a hit when I make it. If you're going to a 4th of July party, this would be an easy dish to bring!

BROCCOLI SALAD
www.DailyMesses.com

Time: About 2 1/2 hours (from cooking bacon to refrigerating)
Serves: (12) 1/2 cup servings

You will need:
2 Tablespoons vinegar
2 Tablespoons sugar
3/4 cup mayo
6 cups broccoli, cut into bite size/small pieces (1-2 heads of broccoli)
1 small red onion, chopped
7 slices bacon, cooked crisp, crumbled
1/2 cup raisins

Directions:
  1. Put broccoli in a mixing bowl
  2. Add remaining ingredients. Mix well.
  3. Refrigerate 2 hours.
  4. Enjoy!

OPTIONS: Occasionally, I'll add about 8 oz. shredded or cubed sharp Cheddar Cheese.

Friday, June 29, 2012

Things Kids Say


Ok, so some of you might remember my  Things I Never Thought I'd Say post. This is the kids version. Sometimes my kids say things that just make me laugh.

No Nakie Boy picture,
but this is his other
super hero outfit
  • Today Higgins asked if we could go to a golf course one day (big fan of put-putt). Bernardo replies, "Yeah. I know how to play golf. You just whack a ball into a hole."
  • Octopuses are cool; they pee in the ocean.
  • I nakie boy! (Said while standing completely naked in traditional super hero pose: legs apart and fists on hips.)
  • Mommy, those cars don't have pants on.
  • Mom, can I have some of those packing peanuts to eat? (He meant circus peanuts.)
  • As we are leaving the house, the dog tries to come with us. Higgins tells the dog, "No, Dog, you're going to stay here with the toys."
  • Bernardo: "Why isn't the store green if they call it Walgreens?"
  • Daddy, why are you dressed like a grizzly bear? (My husband came in wearing a brown wool sweater.)
  • Mom, can I have some of that old candy you gave us? (I gave them a Bit O Honey bar to share and told them it was an old-fashioned type of candy.)
  • Me: "Higgins, did you poop?" (We're potty training.). Higgins: "No." Me: "Someone pooped. It smells like you did." Higgins: "Aunt N pooped my pants." Me: "Aunt N pooped in your pants?" Higgins: "Yup." (Aunt N lives roughly 900 miles away.)
  • Bernardo: "I can't wait to be a grown up." Me: "Why?" Bernardo: "So I can stay up late and watch violent movies and drink coffee with Daddy." 
  • Crying from the family room....Me: "What happened?". Higgins: "I got hurt.". Me: "How?". Higgins: "...Doing something bad."
  • Bernardo: "Mom, I'm gloomy today. That means sad."
  • Diaper rash is poopy's friend. (My son's response when I told him if he pooped in the potty, he wouldn't get diaper rash anymore.)
  • Thank you doggie for cleaning up my chair. (Aka licking all the spaghetti off that didn't make into my son's mouth.)
  • Bernardo, "Mom, does Aunt N have kids?" Me, "No." Bernardo, "Well, I wish Aunt N. would get married already!" (He apparently wants more built in playmates.)
  • After reading "George Flies A Kite", Higgins tells me "Mommy, we should get doggie a bunny." I replied, "the dog would eat the bunny". Higgins rebuts, "we could keep it away from doggie". So to clarify, Higgins wants to get the dog a pet bunny that she isn't allowed to see or play with.
  • From the bathroom: Bernardo, "Why did you pee on my leg and shorts!?". Higgins, "I don't know."
  • Bernardo: "Mom, is the neighbor's kid in Kindergarten or College?" Me: "I think he's at college." Bernardo: "Wow, he must be really old." I must be ancient; I've been out of college for 10 years now.
  • Me: "My head hurts this morning." Bernardo: "Why? Have you been using it too much?"
  • Higgins: "Ha ha. He's licking his wiener."  
  • "Ha Ha. He's licking his wiener."

Thursday, June 28, 2012

Vacation Crossword Puzzle

Since it's the start of vacation season, here's a vacation themed crossword puzzle!


STOP! ANSWERS BELOW!


Be. Wine Review

I am a BzzAgent; I get a sample or a coupon for a product, along with coupons to share. (For more info on BzzAgent, check out my Freebies For Adults post.)


Recently, I received a Bzz kit for Be. Wines. The kit came with some Be labeled products (lip gloss, nail file,  mints, and a small mirror) and mail in rebates for the wine.

There are 4 varieties for the Be. Wines:

  • Be. Flirty Pink Moscato: "rich berry and delicate floral notes"
  • Be. Bright Pinot Grigio: "sun-ripened citrus flavors and zesty hints of citrus"
  • Be. Fresh Chardonnay: "crisp green apple flavors and zesty hints of citrus"
  • Be. Radiant Riesling: "tantalizing fruit flavors and bright floral notes"

I was in the mood for something sweet, so I picked the Pink Moscato and let it chill for a couple hours until dinner. (Ok, so it didn't really pair with dinner, but I really wanted to try it.) It is definitely a sweet wine. It is great for sitting around, sipping while talking with hubby or friends, or reading a good book. It leaves a nice slightly sweet aftertaste, nothing too strong. Most of the time when I read wine descriptions, I can't taste whatever they described. (I always fall for ones that state chocolate in the taste description and am pretty much always disappointed.) This time, I could actually taste berry type of flavors in the Pink Moscato! 


This is one wine I will definitely be buying again! If you like sweet wines, give it a try :)
It must be good! The bottle's almost gone and I usually
don't drink that much!


*These are just my opinions. I receive free samples from BuzzAgent, but am in no way compensated otherwise.

Wednesday, June 27, 2012

It's Sunglasses Day!

Today is Sunglasses Day! I thought it would be fun to paint our own sunglasses. Because Higgins has already broken 2 pairs of sunglasses this year, I bought the cheapest plastic ones I could find. He is super excited about making his own, so maybe these will actually last!


You will need:

  • Sunglasses (you can often find cheap plastic ones at the dollar bins at Target, Michael's craft stores, or local dollar store)
  • Mod Podge, optional
  • Acrylic enamel craft paint
  • Paint brush(es)

Directions:
  1. If you have messy painters, you may want to cover the lenses with painters tape.
  2. Paint on designs, names, or shapes.
  3. Let dry.
  4. Cover in a coat of Mod Podge. This step is optional, but I found that the paint chipped off our glasses without a top coat of the Mod Podge.


Tuesday, June 26, 2012

Pinwheel Fun


I'm going to come right out and say it: this craft drove me nuts. It took me awhile to find the best mix to create a spinning pinwheel. (As a side note, if you want a pinwheel that doesn't spin, I have lots of extras!)

You will need:
Paper (computer, construction, or cardstock)
Push pin or small nail
Dowel rod
Small beads
Glue stick

Directions:
1.  For a large pinwheel, cut a 7x7 square out of a piece of cardstock or construction paper.

2.  Divide the paper into four equal squares using a ruler and a pencil.

3.  If wanted, color the paper.

4.  Next, at each corner draw a 3 1/4 inch long line diagonally towards the middle.
I colored in each section so you
could see things a little better.

5.  Cut along each line.

6.  Number each line 1, 2, 3, 4.

7. Place glue in center. Fold number 1 to center.

8.  Add glue. Fold down 2.

9.  Add glue. Repeat for 3 and 4.

10. Hold in place.

11. Place a bead on the pin and push pin through center of paper.

12. Place two small beads in the back onto the pin.

13. Place pinwheel/pin/beads on top of a dowel rod/stick on a flat surface.

14. Hammer the pin into the dowel rod.

Alternatives:

  • Color yours red, white, and blue for a 4th of July craft.
  • Push the pin into the eraser on top of a pencil. (Be careful: mine kept falling off when blowing it to spin. If you had a longer pin, it might work better.)


Monday, June 25, 2012

More Recalls!


Hi, everyone! Hope you are having a good Monday! I have more recalls, this time food related, to pass on.


What: Healthy Choice Liquid Gold Carrot Juice
Hazard: Potential botulism
Look for: All sizes are being recalled (128oz, 64oz, 32oz, 16 oz, etc.). Look for UPC # 7 63213 00130
Contact: Healthy Choice (213)749-7999
FDA, Healthy Choice Liquid Gold Carrot Juice


What: Dole Bagged Salad
Hazard: Possible Listeria
Look for:
  • Kroger Fresh Selections Greener Supreme with Product Code N158 211B 1613 KR04, use-by date June 19 and UPC 11110 91039
  • Kroger Fresh Selections Leafy Romaine with Code N158 111B KR11, use-by date June 19 and UPC 11110 91046 
  • Wal-Mart Marketside Leafy Romaine with Code N158111B, use-by date June 19 and UPC code 81131 02781
Sold At: Kroger and Wal-Mart stores
Contact: Dole  (800) 356-3111
FDA, Dole Bagged Salad Recall


Identify This: Part 16

If you think you know what it is, or just want to guess, post in the Comments! For the answer, scroll down to the bottom!


STOP! ANSWERS BELOW!


Chicken Casserole

This dinner is a big hit at my house; in fact it was hubby's #1 dinner for many years (it has since been replaced in ranking by meatloaf). It is also my go-to dish when a friend has a baby. I can make it ahead and either cook it and bring it over hot or get it all ready and they can simply stick it in the oven. It also tastes really good reheated.


Grandma's Chicken Casserole
www.DailyMesses.com
Prep Time: 50 minutes (Baking the chicken and mixing ingredients.
Cook Time: 40 Minutes
Total Time: 1 hour, 30 minutes

You will need:
5 chicken breasts (boneless/skinless), cooked and cubed
1 can Cream of Chicken Soup
1/2 cup water
(1) 6 oz package of Swiss Cheese, sliced
(1) 8 oz package Stuffing/Dressing, Chicken flavored
1 stick butter/margarine


Directions:
  1. Preheat oven to 350 degrees F.
  2. Mix together cooked/cubed chicken, soup, and water. 
  3. Spray baking dish with cooking spray. 
  4. Put the chicken mixture into the baking dish. 
  5. Lay Swiss Cheese slices on top of chicken.
  6. Melt butter. Add stuffing. Mix well. 
  7. Pour stuffing on top of Swiss Cheese.
  8. Bake at 350 degrees F for 45 minutes. (HINT: About halfway through cooking, check the stuffing. If it is getting too brown, cover with aluminum foil.)
UPDATE:
I just started putting in green beans, probably about 1 1/2 -2 cups of green beans. Cut green beans into 1/2-1 inch pieces and mix into casserole. Top with stuffing as above and cover with foil. Bake for 30-40 minutes. Uncover and bake another 10 minutes.

Sunday, June 24, 2012

Handy Flowers


These are a super easy craft. They would be great as a card to Grandma, as a Thank You card, or an invitation to a tea party! If you do one every year, you can show your kids how much they grown in just 1 year!

You will need:
  • Cardstock or other thick paper
  • Craft paint
  • A foam paint brush
Directions:
  1. Lightly coat the child's hand with the craft paint.
  2. Press onto the paper, towards the top so you have room for the stem and leaves.
  3. Paint on a stem and leaves.

Saturday, June 23, 2012

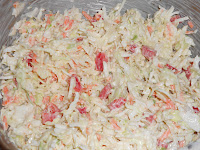
Easy Coleslaw Recipe


My parents make an awesome coleslaw. However, when I tried to get the recipe, it was measured in globs and handfuls. I think this recipe comes pretty close. For a 4th of  July party, use red bell peppers!

Sarah's COLESLAW:
1 bag (14 ounce) coleslaw mix. (Coleslaw mix is green cabbage, some red cabbage, and carrots shredded.)
2 Tablespoons Apple Cider Vinegar
2 Tablespoons Sugar or Sweetener
1/2 cup bell peppers, diced
1/3 cup onions, diced
3/4 cup mayo (Do not use Miracle Whip! It changes the whole taste of the coleslaw.)

Directions:
Mix all ingredients together. Store in refrigerator until ready to use. (My husband likes it best when it has sat for at least an hour so the flavors can blend together a little more). You can adjust the recipe to your own tastes. Tip: Be scarce on the vinegar until you know your preferences. It's hard to fix too much vinegar!

It's A Picnic!

Ants On A Log
Whether its nice outside, or raining, it's always the perfect time to have a picnic! All you need is food, a blanket or table, and some drinks. We were planning on eating a picnic in the backyard, but the weather didn't cooperate. Instead, I spread a blanket on the floor and we ate in the family room. Lunch was pretty normal, although I made "ants on a log" to go with it. Simply spread peanut butter on a piece of celery and place some "ants" (raisins) on the celery "log". To keep with the bug theme, freeze some raisins in ice cubes to create "fly" ice cubes.

After lunch, make some ant artwork! All you need is paper, black craft paint or ink pad, and a thin black marker or pen. Dip your child's finger tip in the paint or ink pad and press three times in a row to create the body of the ant. With the marker/pen, draw on 6 legs and 2 antennae. 
Ant Craft

ANT FACTS:
Ants can lift 20 times their body weight.
Ants have 6 legs.
Ants hear through their feet; they don't have ears!
Ants breath through tiny holes on their bodies they don't have lungs!
There are more than 10,000 types of ants.
A queen ant is the only ant that makes babies.
Soldier ants protect the colony and the queen. They also gather food.
Worker ants do not have wings, but the males and queen do.
Most ants live 45 to 60 days.
Ants have two stomachs. One is for the food the ant will eat, the other holds food to share with the other ants.
Worker ants sometimes leave a scent trail for other ants in the colony to find food. Worker ants are female.
Some types of ants steal larvae from other colonies to work as slaves in their colony.


LINKS:
www.pestworldforkids.org/ants.html
www.lingolex.com/ants.htm
National Geographic
About.com, ants

Friday, June 22, 2012

Identify This: Part 15


If you think you know what it is, or just want to guess, post in the Comments! For the answer, scroll down to the bottom!


STOP! ANSWERS BELOW!


Snack Box


These days, I have two bottomless pits for children. They are hopefully just going through a growth spurt. They're going to be horrible when they're teenagers if they keep this up. Based on having ravenous beasts as children, I never leave home without snacks in the car or the diaper bag. Plus as the kids know, my husband "hates wasting". We already went to the grocery store, so why waste more money buying snacks out. (Not that we never do this, but having a snack box really does help.)

After trying many, many different ideas, I learned a few things:
  • Snack bags of pretzels thrown into a diaper bag will not survive.
  • While driving, the snacks need to be easily accessible. (I know my hands are supposed to be at 2 and 10, but come on! The two whiny kids in the back are way more of a distraction.) This also applies to snacks in diaper bags, especially if waiting in line somewhere or at a park/zoo/theme park.
  • Gooey or messy candy are a big NO! (Car seat and Booster seat covers can be washed, but it's a pain to put them back on and the gooeyness sometimes leaves a stain).
  • Expect a mess and pick snacks that are easily cleaned up. (This kind of goes with the third learning, but slightly different.) Goldfish, pretzels, and crackers can create huge crumbly messes. However, a vacuum generally cleans it up quickly and easily.
  • Always have a bottle of water (plastic bottles, reusable bottles, sippy cups--they all work). I keep a bottle in the diaper bag so we always have one while we are out, and I also grab some before I leave the house for the car. After eating pretzels (or other snacks), I know I'm going to hear "I'm thirsty. Can I have some water?". If it is early in the park playing season, the water fountains are not always turned on yet (or if it's fall/winter time, they may be turned off already). Plus my youngest is horrible at backwash and I will not (if I can in anyway help it) drink from his bottle of water, so I try to keep a bottle for everyone.
  • Pack 2 (3, 4, or 5...however many kids you have!) of everything. My kids love to fight with each other, especially if they are stuck in a car seat with nothing else to do. If they have their own bag, I don't have to keep saying "Share with your brother", "It's his turn now, give him the bag", "If you don't give him the bag right now, I will take it away from you and you won't get it back". You know, normal car ride stuff!
  • If it's a long car ride, I bring a small box of snacks. I try to pack special treats (i.e. fruit snacks--the kind that has no real fruit in them), especially if it is a vacation trip.
  • Keep a roll of paper towels, diaper wipes, or napkins in the car. For my small Car Box, I threw in some plastic silverware and napkins.
So what do I keep in my Snack Box?
  • Nuts (lots of protein, small containers, lay flat nicely)
  • Fruit Snacks (generally the real ones, also called fruit leathers, that are simply dried fruit puree in a strip format)
  • Granola or Breakfast Bars
  • Crackers: The pre-packaged peanut butter or cheese crackers.
  • Twizzlers (the individually wrapped ones; they got a ton of these for Halloween and I set them aside for the Snack Box)
  • M&M's (I know, they can get messy, but I try to keep a mix of snacks in the box. I use the individual packs, also taken out of Halloween and Easter candy bags. Don't leave these in a car during warm weather though!)
  • Smartie's. These are great if you are waiting in line somewhere for a long time. If you hold the roll, you can dish these out one at a time over several minutes. It takes up time and to get the next one, they have to behave!
  • Suckers/Lollipops
  • Boxes of Raisins
  • Snack size bags of pretzels or Goldfish
  • Individually packaged Pepperoni Sticks

Car Snack box
Diaper Bag Snack Box


Thursday, June 21, 2012

Summer Fun Word Find


In honor of first day of summer, today's Word Find is Summer themed! I hope you enjoy!


STOP! ANSWERS BELOW!


I Scream, You Scream. We All Scream For...Cupcakes!


For these "sundaes" you will need:
  • Chocolate cake mix (plus ingredients listed on back of box)
  • Waffle bowls (4 oz size)
  • Large marshmallows
  • Maraschino Cherries
  • Whipped Cream (like Reddi Whip or Cool Whip)
  • Sprinkles and/or nuts
  • Hot Fudge/Caramel/Strawberry Topping or Sauce
Directions:
  1. Bake and cool cupcakes.
  2. On a baking sheet, place waffle bowls.
  3. In each bowl, place 1 cupcake. 
  4. Next place 2 marshmallows on top.
  5. Bake until marshmallows are just softened (about 2-3 minutes).
  6. Microwave jar of fudge sauce (remove lid first!) for 10 seconds, or until softened.
  7. Place sauce on top of marshmallows.
  8. Next, place sprinkles/nuts, whipped cream, and a cherry!

HINT: Brownies also work great in this dessert!
These took about 1 1/2 hours from baking the cupcakes to completion.

Wednesday, June 20, 2012

It's Ice Cream Soda Day!

What is an ice cream soda? Is it the same as a float? It all depends on where you are. Apparently (in the US) an ice cream soda is ice cream, syrup, and soda water (carbonated water). A float is ice cream and soft drink, like root beer.

I've had root beer floats before and am a big fan, but I can't remember having an ice cream soda. To make a good post for Ice Cream Soda Day, the boys and I have been hard at work to experience just what the difference is.

The boys eating their root beer floats
First, we went to an old fashioned root beer stand. The inside was small and crowded around a single counter-top bar. We managed to snag two seats at the counter and the boys dug in. The root beer float was perfect; the ice cream was creamy and the root beer was the perfect sweetness and smoothness, nice and mild. The boys left happy. (The stand even sold their root beer by the gallon! We may be heading back for some root beer...and maybe a float or two!)

Root Beer Float


A few days later, we ventured out to find an ice cream soda. There are a few old fashioned ice cream and candy parlors within a 20 minute drive from our house, so we picked one and went. We got there right after they opened, so we beat the crowd and got to sit at the counter. It was super cute inside. They had a tiled floor, a candy/chocolate counter, and the ice cream counter. We agreed to the chocolate ice cream soda and sat on the bar stools and watched as it was made. First she grabbed an ice cream soda glass, added in chocolate syrup, then a couple scoops of ice cream, then soda water and stirred it together. The boys downed theirs in what seemed like seconds and then tried to make a move on mine. (Don't worry, I kept it safe.) It was delicious!


Chocolate Ice Cream Soda
HISTORY OF THE ICE CREAM SODA:
The ice cream soda is attributed to Robert Green. Mr. Green owned or operated a soda fountain. The legend goes that Mr. Green ran out of cream for his drink and instead used ice cream. Viola, the ice cream soda was born! (Mr. Green later stated in a magazine post that he decided to combine soda water and ice cream to compete with another store.)

In different parts of the world, ice cream sodas are called different names. Some of the names are Black Cow, Spider and Float.

As a side note, the legend of the ice cream sundae was born from ice cream sodas. Supposedly, ice cream sodas became so popular that some some places banned the sale on Sundays. (Since soda was also sold as a "cure", it was sometimes thought to be a controlled substance and thus not sold on Sundays.) And so the soda-less ice cream Sundaes were born.

LINKS:
Turkey Hill
Wiki, History of Ice Cream Soda
The Nibble


MY FINDINGS:


What's your favorite, an ice cream soda or an ice cream float? What's your favorite flavor? Post in the Comments and let me know!

Tuesday, June 19, 2012

Identify This: Part 14

If you think you know what it is, or just want to guess, post in the Comments! For the answer, scroll down to the bottom!


STOP! ANSWERS BELOW!


Flighty Cupcakes

These cupcakes are great for a garden or tea party, or as a summer treat.
They took me about 2 hours to do from the time I baked the cupcakes to the time I finished decorating.


You will need:
  • 1 box Cake mix (plus ingredients listed on back of box)
  • Color licorice or Tootsie Rolls
  • Pretzel Twists
  • Candy Melts of your color choice for the wings
  • Frosting
  • Gumdrops or Jelly Beans
  • Wax paper
  • Decorating bags, or Ziploc bags
Directions:
  1. Bake cupcakes according to box directions.
  2. Remove from oven and cool.
  3. Cover cookie sheet with wax paper, then place on pretzel twists.
  4. Melt the Candy Melts and place in a decorating bag or a Ziploc Bag (snip off the end after filling).
  5. Pipe the Candy Melts into the open spaces on the pretzels.
  6. Let the candy set (about 15 minutes in the fridge).
  7. Ice the cupcakes.
  8. Place on wings (pretzels).
  9. Place body in between wings (colorful Tootsie Rolls, licorice, or large jelly beans).
  10. Place head (gumdrop)
  11. Optional: If you want to make antennae, pipe thin lines of brown or black Candy Melt on a piece of wax paper and let set. Once set, press into icing. You could also use piece of thin/string licorice.

Monday, June 18, 2012

Bracelets


For these crafts you will need:
  • Cardboard tubes (large enough to fit over their hands, or you can cut a slit in the middle of a toilet paper roll to make a cuff bracelet)
  • Mod Podge (a craft glue/sealant)
  • Colored tissue paper
  • Paint brush
  • White craft paint
Directions:
  1. Cut tubes into desired widths. Paint with white craft paint and let dry.
  2. Cut/tear pieces of tissue paper. (Cut into strips or shapes.)
  3. Apply a thin layer of Mod Podge on cardboard roll with paint brush.
  4. Lay tissue paper on top of glue. Add more glue and tissue until you get the color depth you want.
  5. Apply a final Mod Podge layer and let dry.
  6. Enjoy!

Sunday, June 17, 2012

Traveling with Kids

It's vacation season! Before we had kids, it seemed like we could pack in an hour, throw some stuff in a backpack or small carry-on and go. Then we got a dog, and it was still pretty easy. Throw some dog food in a bag with her leash and bowls, drop her off and go. Now we have two kids and the dog. Packing is not quick or easy at this point.  When the kids were little, packing was worse with the bottles, sippy cups, diapers, swim diapers, extra clothes, etc. As they get older, it became less baby stuff, but more toys and books to keep them entertained. We still need a water bottle and snacks. I always throw in a few extra shirts because I know there is no way my kids are going through the day without spilling something on themselves or each other. I also like to throw in small first aide kit because you never know when they might get hurt or get sick and you might not be close to a drug/grocery store.

CAR TRIP
Most of the time we drive to our vacation. It can be anywhere from 2 hours to 15 hours away. We make plans to stop along the way to make it more bearable for everyone (mostly the kids because they can't sit still that long), and normally stop every two to three hours for bathroom breaks and to run around. It can still be rough.

However, I did learn what to pack to keep the kids entertained on a long car trip (see below). I also learned that as they get older, the car trip is also part of the vacation. This year, we tried to stop at fun restaurants, rest areas, or even weird attractions along the way (check out Road Side America or Road Trippers for ideas). There are even fossil parks across the country (see list by state and other fossil parks) and the National Park Foundation offers a free Junior Ranger program where kids learn, answer a questions in a booklet and earn a badge.

     CAR PACKING LIST:
This is only a very small view of the mess. The rest
fell out of the car is on the pavement. It happened
every time we got out of the car.
  • TOYS. Toys are a must. We had a box of toys that sat between the kids on the seat so they could grab the ones they wanted. 
  • Coloring books, paper, and WASHABLE crayons/markers. Why washable crayons? Because you never know when the kids are going to get super bored and draw on each other or their car seats.
  • Stickers. These might be better for older kids. When he was younger, Higgins tried to stick them to his car seat in one of his tantrums.
  • Books. I packed a couple of their favorites and also packed a few new ones. If you have a Half-Priced Books (or other used book store) near you, it's a great way to buy a lot of books for pretty cheap.
  • Games. If you have older kids, there are a lot of travel sized games out there. You could also play I Spy or a license plate Scavenger Hunt (see who can find the most states). I also have lots of Word Finds and Scavenger Hunts on the blog, including Car Bingo and a Car Ride Scavenger Hunt.
  • iPad. Load up on some free apps or add on a few new games before leaving to help keep them entertained.
  • DVD player and their favorite movies. We borrowed one from the in-laws and it turned out to be a lifesaver. These have gone down in price a lot over the past couple of years. You can find a decent one for around $100.
  • Music. Ok, this one was mostly for me because I love listening to music. However, the kids also like it, so I have a Kids Playlist just for them.
  • Paper towels.
  • Snacks. We brought a small cooler and packed cheese sticks, peanut butter/jelly sandwiches, and cut up fruit. We also had pretzels, bags of plain popcorn, and trail mix. *This year, the Car Trip Snack Box got upgraded to a Rubbermaid container and a small cooler.
  • Drinks. These were also in the cooler. We packed soda for us and water for the kids. It was a lot cheaper than stopping at a drive-thru every time someone got thirsty.
  • Wet wipes or diaper wipes. After all, snacks can make for sticky messy kids.


PLANE TRIP
We have flown a few times. I learned a few more lessons, as flying with kids was a whole new experience.

     PLANE PACKING LIST:
  • Pack a backpack for each kid. They get to have their own carry-on just like Mom and Dad. Plus, it keeps everyone's toys and snacks separate to reduce fighting.                  

      • Include a change of clothes (at least socks and underwear). 
      • $20-$25 (in different denominations).
      • $3 or so in quarters (vending, emergency phone calls...).

      • Coloring book/crayons/markers. There are a few sets that contain spots for the crayons/markers so they don't roll off the tray. Crayola has a few different kinds called Mini Coloring Pages
      • Book(s) to read.
      • Some toys (no swords or guns on flights).
      • Current family picture, in case they get separated from you.
      • Snacks. Trust me on this; if you get stuck sitting on the runway or in the airport, you are going to want to have some snacks. You can usually bring in pre-packaged snacks. I brought granola bars, snack size bags of M&M's and pretzels, fruit snacks, fruit leathers, nuts, suckers, and some hard candy.
      • Water bottle (will have to buy at the airport after pass through security, or bring a reusable one and fill at a water fountain after security). 
      • A card with peoples phone numbers. See my post on Picture Phone Cards For Kids.
      • Games, iPad, Nook, Kindle.
    • Gum. Our family tends to have ear pain during take off and landing. Chewing gum helps a lot. If you have little kids (like Higgins) who insist on swallowing the gum instead of chewing it, pack some jelly beans! I gave Higgins one jelly bean at a time; he could chew, swallow, and help his ears at the same time.
    • EarPlanes Ear Plugs. These are ear plugs made for flying and they come in adult and child sizes. *Update*I tried these while flying to my sister's wedding with a bad cold. These helped so much!

    For more vacation tips, check out my Vacation Time! post.

    You may also like:
    Snack Box
    Picture Phone Cards For Kids

    Father's Day Word Find

    Happy Father's Day! I hope you all get to relax, maybe eat some breakfast in bed and work on a Word Find, and know that we love you and appreciate all that you do.


    STOP! ANSWERS BELOW!

    Saturday, June 16, 2012

    Bathroom Conversations

    My oldest son started talking before he was 1 and hasn't stopped since. From the time he wakes up to the time he sleeps, it is non-stop talking. It's not just at home either. Bernardo likes to give me the play by play in public bathrooms. I suppose it's partly my fault. He's allowed to go into the stall by himself and lock the door, but he has to wait for me to say it's ok to unlock and come out. Why does he have to wait you ask? Because sometimes I have to go to! This last monologue took place in the grocery store bathroom. Luckily no one else was in there, but in the past he has been known to crack up the older ladies in other stalls.

    Grocery Store Bathroom Monologue by Bernardo
    I'm pushing out the poo...Ok, I'm done going poo. I have to wipe my butt. The toilet paper's a little high, but I'm sure I can reach it...Sometimes when my butt hurts it means I have to go poo. This bathroom sure is clean. Is pee the drinks your body didn't use?...


    *Sigh.* Oh, well. I'm just grateful it was a quick, easy poo. When he "has to go poo, but the poo doesn't want to come out", I hear updates every 15 seconds or so on the pooping situation.


    Does anyone else have a talker? Please post in the comments if you do! Thanks.


    Fresh Veggies Day Word Find

    In honor of Fresh Veggies Day, here's a veggie themed Word Find!

    Weekends are a great time to go to a local Farmer's Market to get your fresh veggies! Try http://www.localharvest.org/farmers-markets/ to see if there are any Farmer's Markets near you (or Google "farmer's market" and your zip code).


    STOP! ANSWERS BELOW!


    Friday, June 15, 2012

    Top Reasons Why My Kids Say Dad Is Awesome

    As we were wrapping Father's Day presents, I asked my kiddos why they loved Dad. Below are their top reasons. (HINT: A video of this makes a great Father's Day gift!)

    Dad lets us watch Netflix.
    Dad reads us stories.
    Dad turns songs on the iPad.
    Dad brings us to stores to get Mom presents.
    Dad brings us to the ice cream place when Mom's gone.
    Dad brings us to the park.
    Dad lets me play Angry Birds sometimes on the computer.
    Dad helps us build Lego's.
    Dad brings us to fun places.
    Dad makes us sundaes when Mommy's gone.
    Dad loves us so much.
    Dad gives us rides. (piggy back rides)

    "I love you, Dad!"

    Alligator Cupcakes and Cookie Pops

    Do you have an alligator lover in your life? Ever since we went on an airboat ride, the kids wanted to see an alligator again. So I made alligator cupcakes and cookie pops!


    I'll start with the cookie pops since they're less time consuming.
    HINT: If you are going to make both, make extra alligators (minus the sticks) for the cupcakes. It took me about 3 hours from making the cupcakes to finish decorating.

    ALLIGATOR COOKIE POPS


    For the Cookie Pops, you will need:
    • Nutter Butter Cookies
    • Green Candy Melts (Candy coating wafers you heat up to mold candy or coat confections)
    • Cookie/Lollipop sticks
    • Brown or Black Candy Melts
    • White Candy Melts
    • Circus Peanuts (I love these! I bought the big bag so I wouldn't eat all the raw materials.)
    • Decorating bags or Ziploc bags (for piping on eyes, nostrils, and teeth)
    • Foam block
    • Wax paper


    Directions for Cookie Pops:

      1. Cut a horizontal slit in one end of a circus
           peanut and prop open. This will be the 
           mouth. Let dry for 30-40 
           minutes. I propped mine open with a 
           cookie stick.
      2.  Cover cookie sheet with wax paper.
      3.  Melt green Candy Melts. (see package 
           for directions.)
      4.  Take apart the cookie. Dip one end of 
           stick in the Melts and place on cookie. 
           Top with the other cookie side. Set on 
           cookie sheet. 
      5.  Place cookies/sticks in the fridge for 
           10 minutes to allow the Candy 
           Melts to set.
      6.  Next, dip the circus peanut in the Melts. 
           (I used a toothpick to dip them in.) Allow 
           any extra to drip off. Place peanuts on
           wax paper to set. Once they are set, you
           can use a sharp knife to trim any extra
           coating off the edges.
      7.  Once the cookies/sticks have set, dip into 
           the Candy Melts. Allow any extra coating
           to drip off. Place in foam block to set,
           then place in the fridge for 10 minutes to
           help the Candy Melts set faster.
      8.  Place Circus Peanut head onto the cookie pop. 
           You can either place head on before Melts set, 
           or use some melted Candy Melts to attach.
      9.  Melt white Candy Melts and pipe on small 
           circles for eyes. 
      10. Pipe on teeth using white Candy Melts.
      11. Melt brown or black Candy Melts. Pipe on 
            pupils and nostrils.
      12. Let set.
      13. Enjoy!

      Alternatives:
      • Eyes: 
        • Use melted white and dark chocolate chips to pipe on eyes and teeth. 
        • Buy white Candy Melts and color yourself using Candy Colors.
        • Use mini chocolate chips (pointed side down) to create eyes.


      ALLIGATOR CUPCAKES

      You will need:
      • 1 box white or yellow cake mix (plus ingredients listed on back of box)
      • Blue cupcake/muffin wrappers
      • Blue icing (or color your own white icing with blue food coloring or gel icing coloring to get the shade you want)
      • Blue sugar sprinkles, optional
      • Green sugar sprinkles, optional
      • Swedish Fish (or other gummy fish), optional
      • Candy Eyes
      • Nutter Butter cookies
      • Circus Peanuts
      • Green Candy Melts
      • White Candy Melts
      • Brown or Black Candy Melts
      • Green Fruit Loops
      • Wax Paper
      • Decorating bag or Ziploc bag

      Directions for Cupcakes:
      1. Line muffin pan with blue cupcake or muffin wrappers.
      2. Mix cake mix according to box directions.
      3. Fill wrappers with batter.
      4. Bake and cool cupcakes.
      5. Ice cupcakes and set aside.
      6. Make alligators.
      7. Sprinkle blue sugar sprinkles on the cupcake icing, if desired.
      8. Place alligators on top of cupcakes.
      9. Enjoy!

      All done! Just kidding...I have directions for the alligators below!


      Laying Down Alligator:
      1.  Cut a horizontal slit in one end of a circus 
           peanut and prop open. This will be the 
           mouth. Let dry about for 30-40 
           minutes. I propped mine open with a 
           cookie stick.
      2.  Cover cookie sheet with wax paper.
      3.  Melt green Candy Melts. (see package 
           for directions.)
      4.  Dip the circus peanut in the Melts. (I used 
           a toothpick to dip them in.) Allow any extra 
           to drip off. Set on wax paper to set. Once 
           they are set, you can use a sharp knife to 
           trim any extra Melts off the edges.
      5.  Dip Nutter Butter cookie in Melts. (I used a 
           fork.) Allow any extra to drip off. Place on 
           wax paper to set.
      6.  Attach head to cookie with melted Candy 
           Melts. You may need to prop up while
           it sets.
      7.  Pipe on eyes, nostrils, and teeth using
           white and brown/black Candy Melts.


      Alligator With Fish: (This one is my favorite!)


      Front part of cookie trimmed.
      1.   Trim one end of your cookie. This part is 
            optional, depending on what you want
            your alligator to look like. I did a few
            trimmed and a few not.
      2.   Take apart Nutter Butter cookie.
      3.   Cover cookie sheet with wax paper.
      4.   Melt green Candy Melts.
      5.   Dip each half of cookie into the Melts. 
           (I used a fork for dipping.) Allow any 
           extra to drip off. Place on wax paper to 
           set. Once set, you can use a sharp knife
           to trim any extra candy off the edges.
      6.  Add green sprinkles to the top (ridges 
           showing) of a cookie piece, if desired. 
           This will be the top of the head.
      7.  Let set.
      8.  Dip bottom of Fruit Loop in green Candy 
           Melt. Attach to cookie, towards the back
           to create an eye. Repeat for other eye.
           Let set.
      9.  Attach Candy Eye to Fruit Loop using
           melted green Candy Melts. Let set. I had
           to prop my Candy Eyes up using a
           toothpick so they dried in the right place.
      10. Smear a little melted green Candy Melt
            at the front of the bottom piece of
            cookie half and set gummy fish on.
      11. Smear a little Candy Melt on top of fish.
      12. Smear some melted green Candy Melt
            at the back of the bottom piece of
            cookie half.
      13. Place top of head on (the one with
            sprinkles). You may need to lightly hold
            or prop it for a minute until the Candy
            Melt starts to set.
      14. Pipe on nostrils and teeth using Candy
           Melts.


      Alligator Head In Water:

      1.  Dip cookie in Candy Melts. Allow extra to drip off. 
      2.  Set on wax paper and allow to set.
      3.  Cut in half.
      4.  Decorate: Pipe on eyes or use Candy Eyes and pipe on nostrils.
      5.  Place on cupcake.
      6.  Spread additional icing around the head to cover the cut mark.